
Pedro Camargo, Ph.D.
Monday, January 2, 2017
Scenario comparison
Just like it happened for the stacked bandwidth tool, I got a “ feature request” from colleagues at work for a scenario comparison tool, much in the style available in every single commercial software available out there.
However, as QGIS allows for the creation of stacked bandwidths, it was natural to create something a little better that would overcome a major flaw of the scenario comparison tools I know. As you are probably used to see, traditional scenario comparison tools are only able to plot the difference in flows between two scenarios, but you lose the perspective on the total flow on each link. In turn, that perspective is important when you are visually inspecting the results and allow a modeller to deliver more meaningful results to their clients.
With this in mind, I implemented a scenario comparison tool that plots three sets of bandwidths (1 for each link direction): Flow that is common for both scenarios, the flow that is in excess for the base scenario in red and flow that in excess for the alternative scenario in green.
Not surprising, this twist on how to present scenario comparison allows for other types of analysis, such as peak intensity, when you analyse the difference between AM and PM peaks. In the example below for some 2031 flows in the neighbourhoods of Brisbane, Australia, it is possible to distinguish some corridors with very intense traffic that present no discernible difference between AM and PM peaks, while some links present peak flows that nearly double when comparing these two periods (i.e. their flows when in aligned with peak direction are double than those verified when they are in their counter peak).
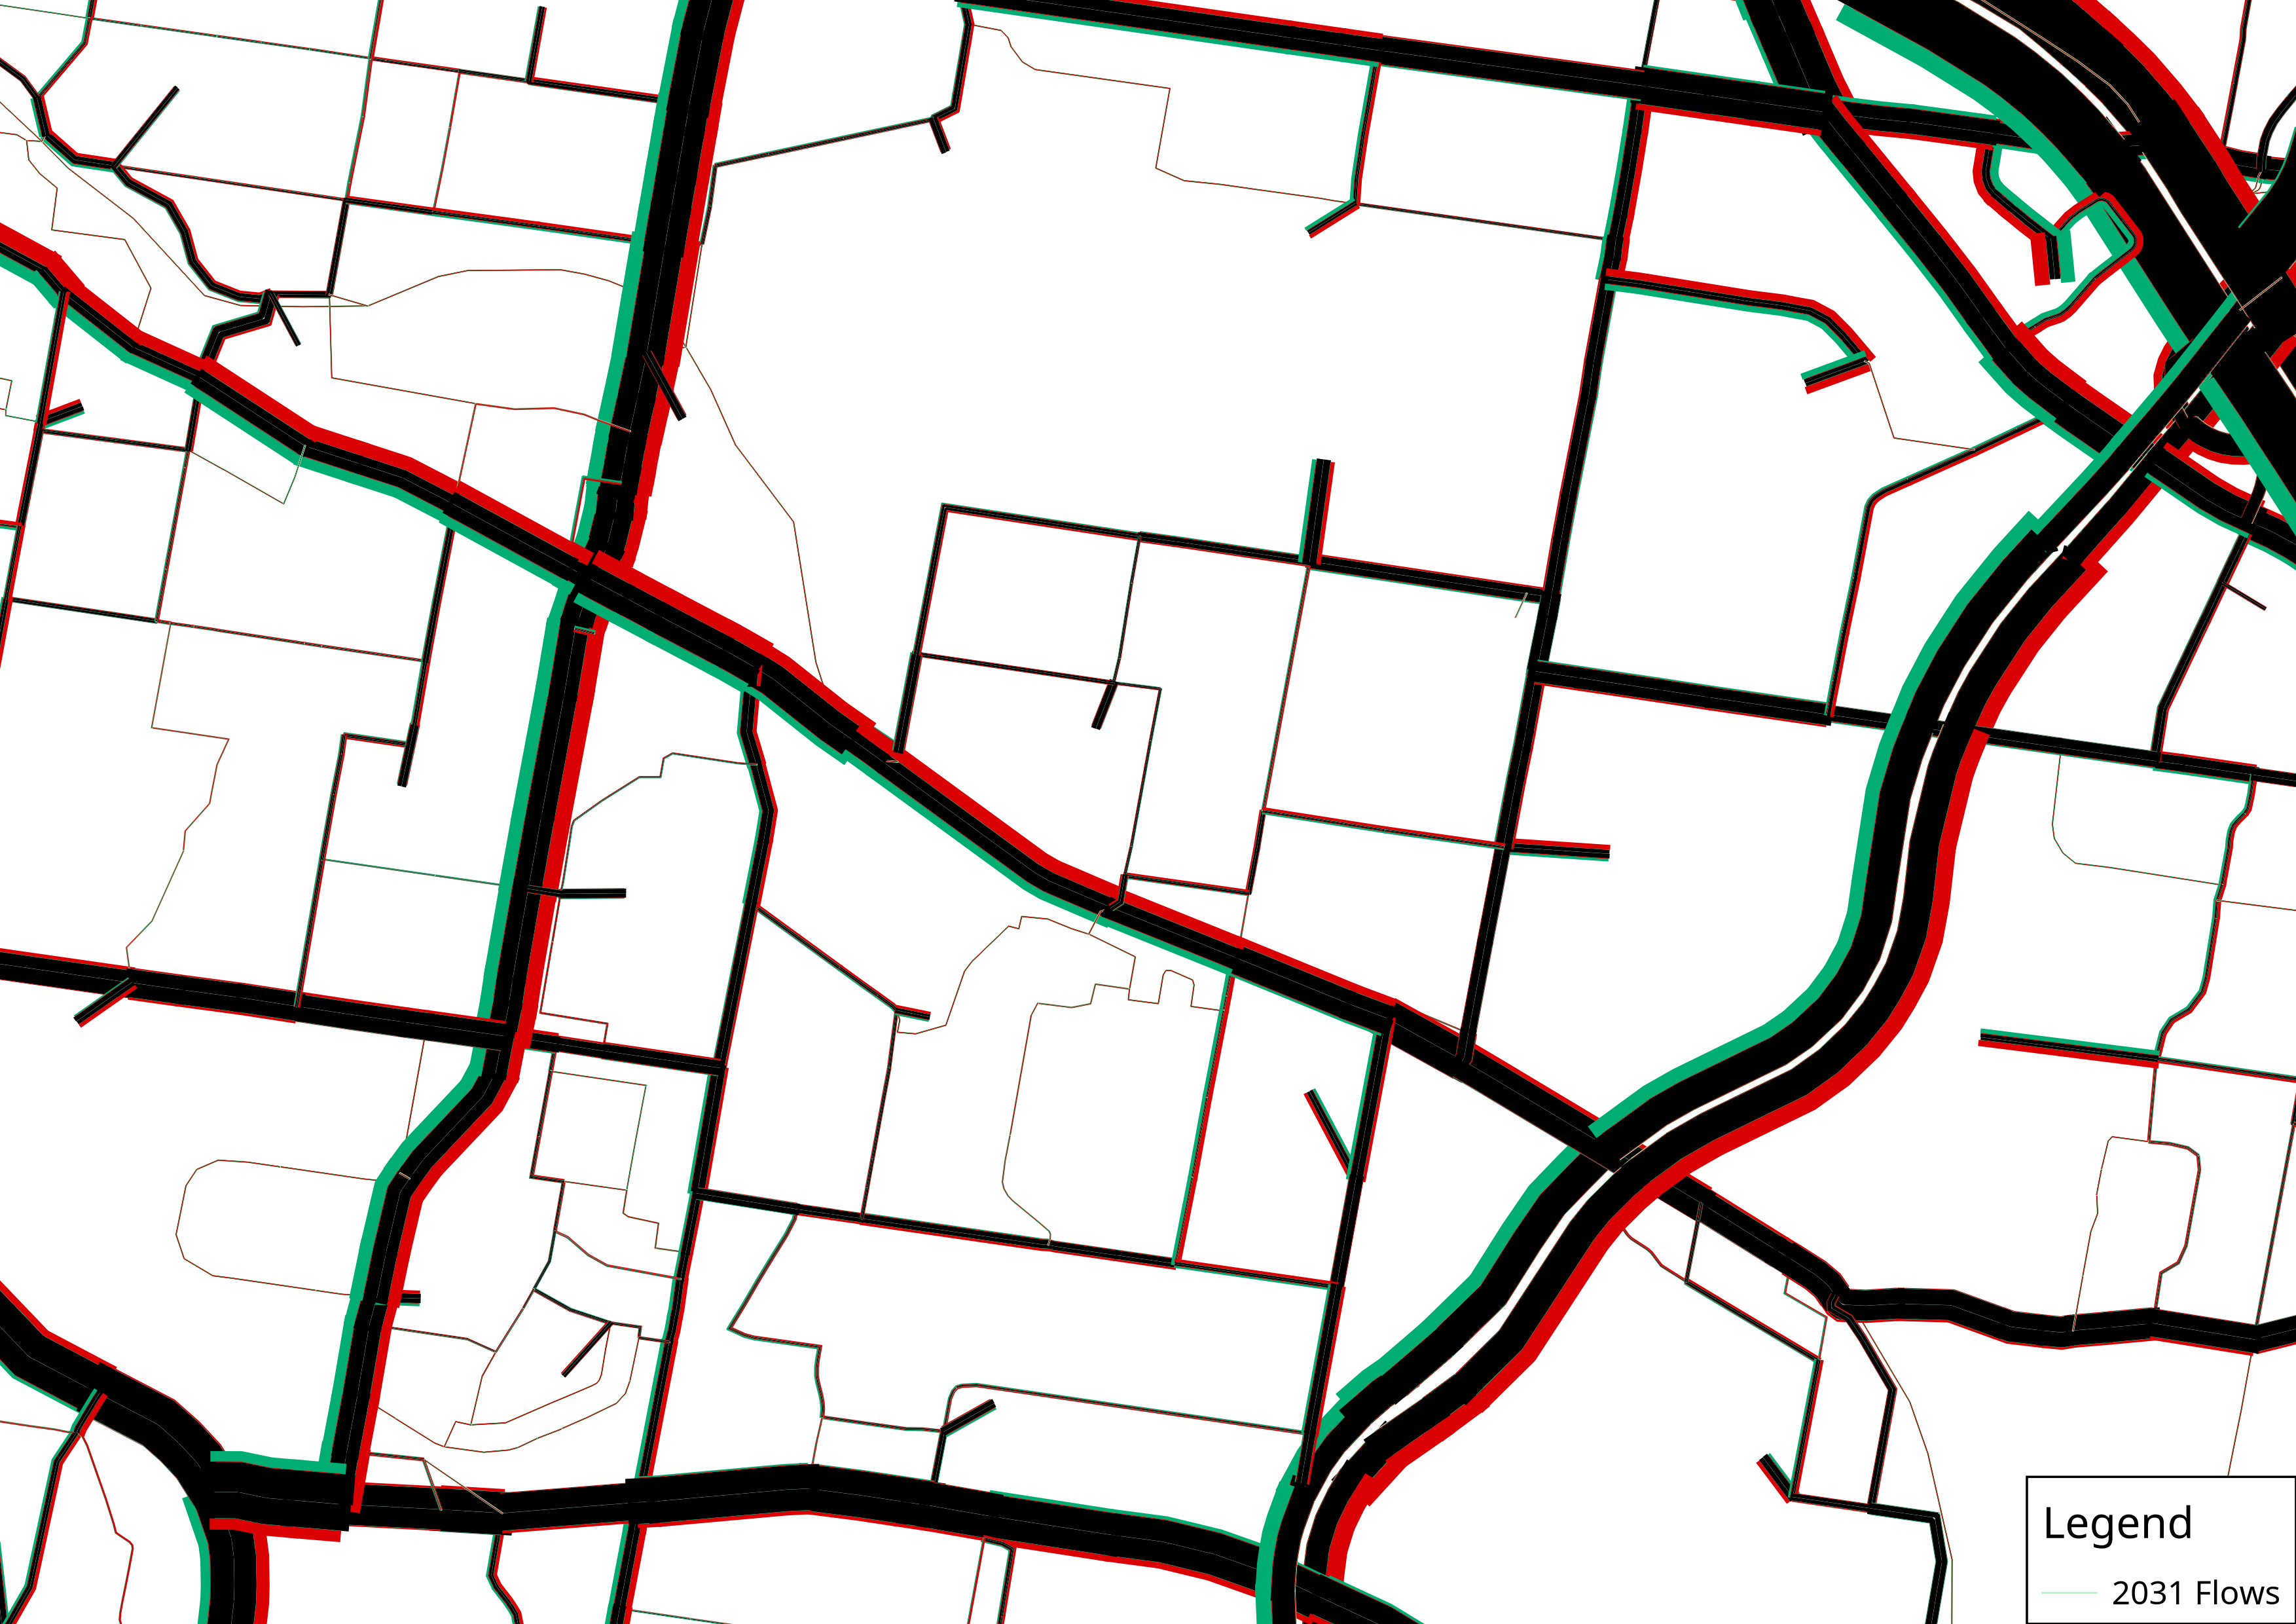
There are two things you would find in commercial packages, however, that you will not find in AequilibraE. The first one is link flow aggregation (especially for transit), but that is tied to the data structure used in each model and vary sharply between models implemented in different packages, therefore virtually impossible to implement here. The second missing feature is the joining of the two scenarios you want to compare, but that is beyond simple and would require you to fill more fields (with ID fields) every time you want to make a comparison, so I left it to each user to make that join.
I also prepared a little video on the use of this scenario comparison tool, that is as short as the tool is sweet.
Finally, of course I also implemented at traditional scenario tool, as explored in the video, but that would hardly be blog-worthy.
Once again, kudos do Jordan Evans, who gave me some of the ideas implemented in this tool.